
I have a fascination with arcade hardware, but it’s just too big and expensive to own a real one. While I have covered the Arcade 1Up Mortal Kombat cabinet, it just seems that you really need to put a personal touch on something and build it yourself or heavily mod an already-made one to make it feel proper. The Pimoroni Picade was the next best thing, as I already had a Raspberry Pi 4 laying around from a retropie project I tried and gave up on. This was a long journey of fiddling, learning, and searching for answers, as the software side was way more complicated and troublesome than the hardware build. I’ll cover the hardware part in this review, but I have something coming up that will cover a full guide on setting up a Retropie for Dummies. Not just for the Picade, but in general, as there isn’t one online that exists.
The Unboxing
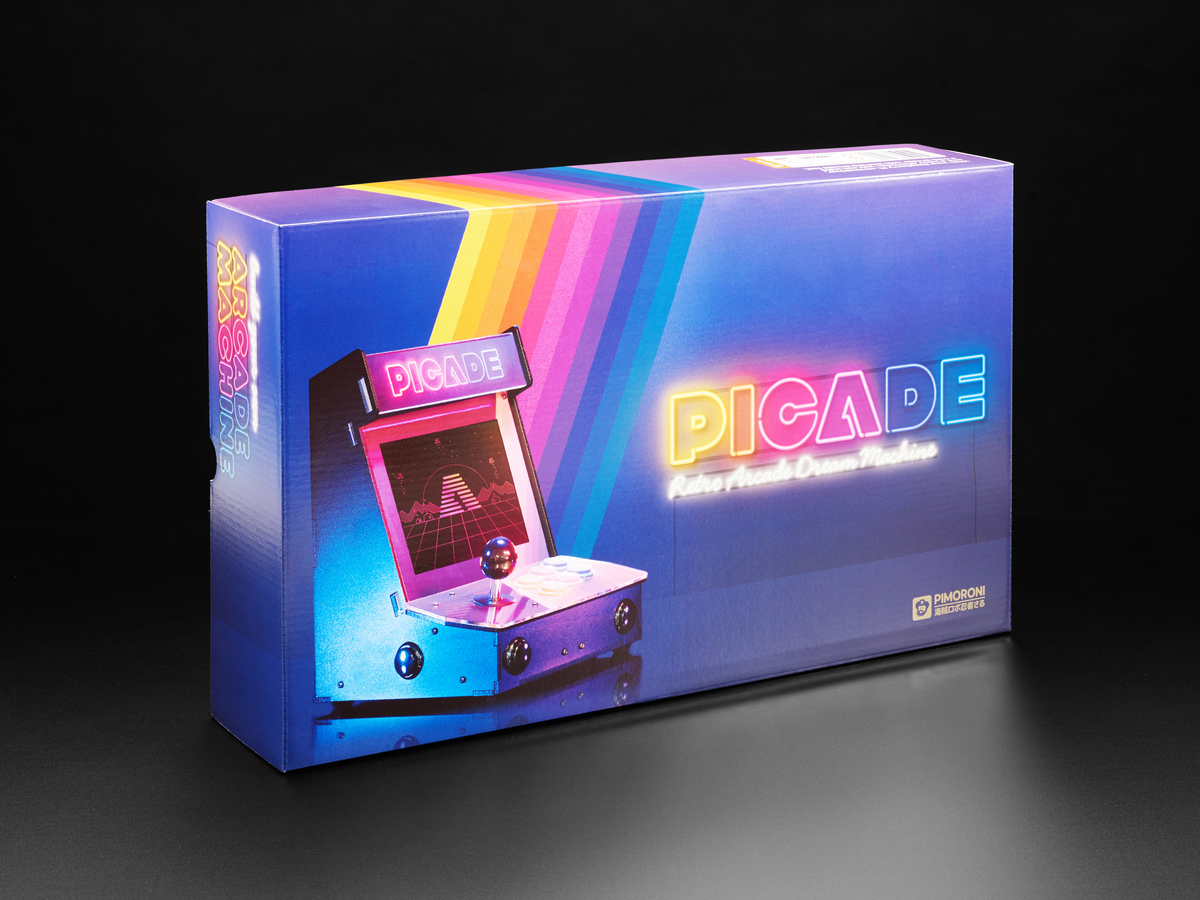
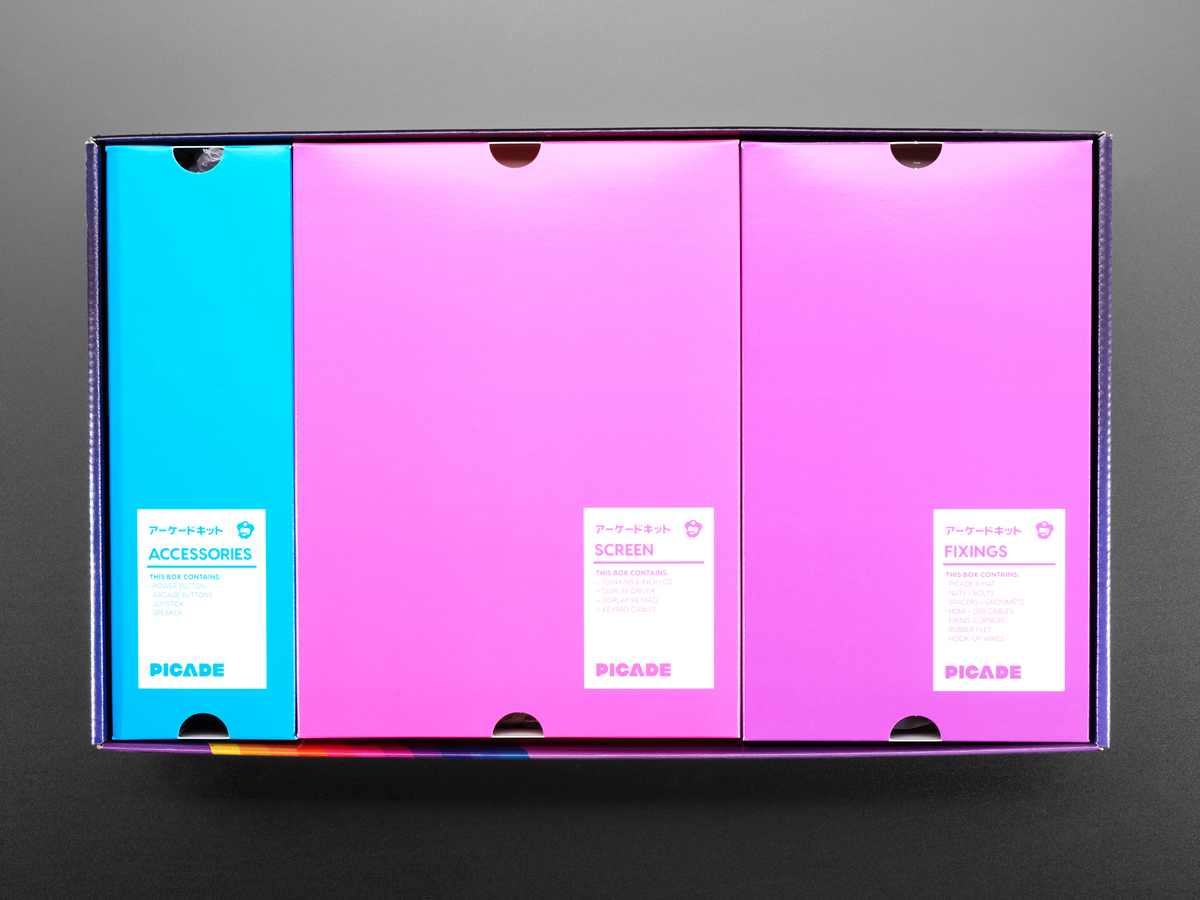
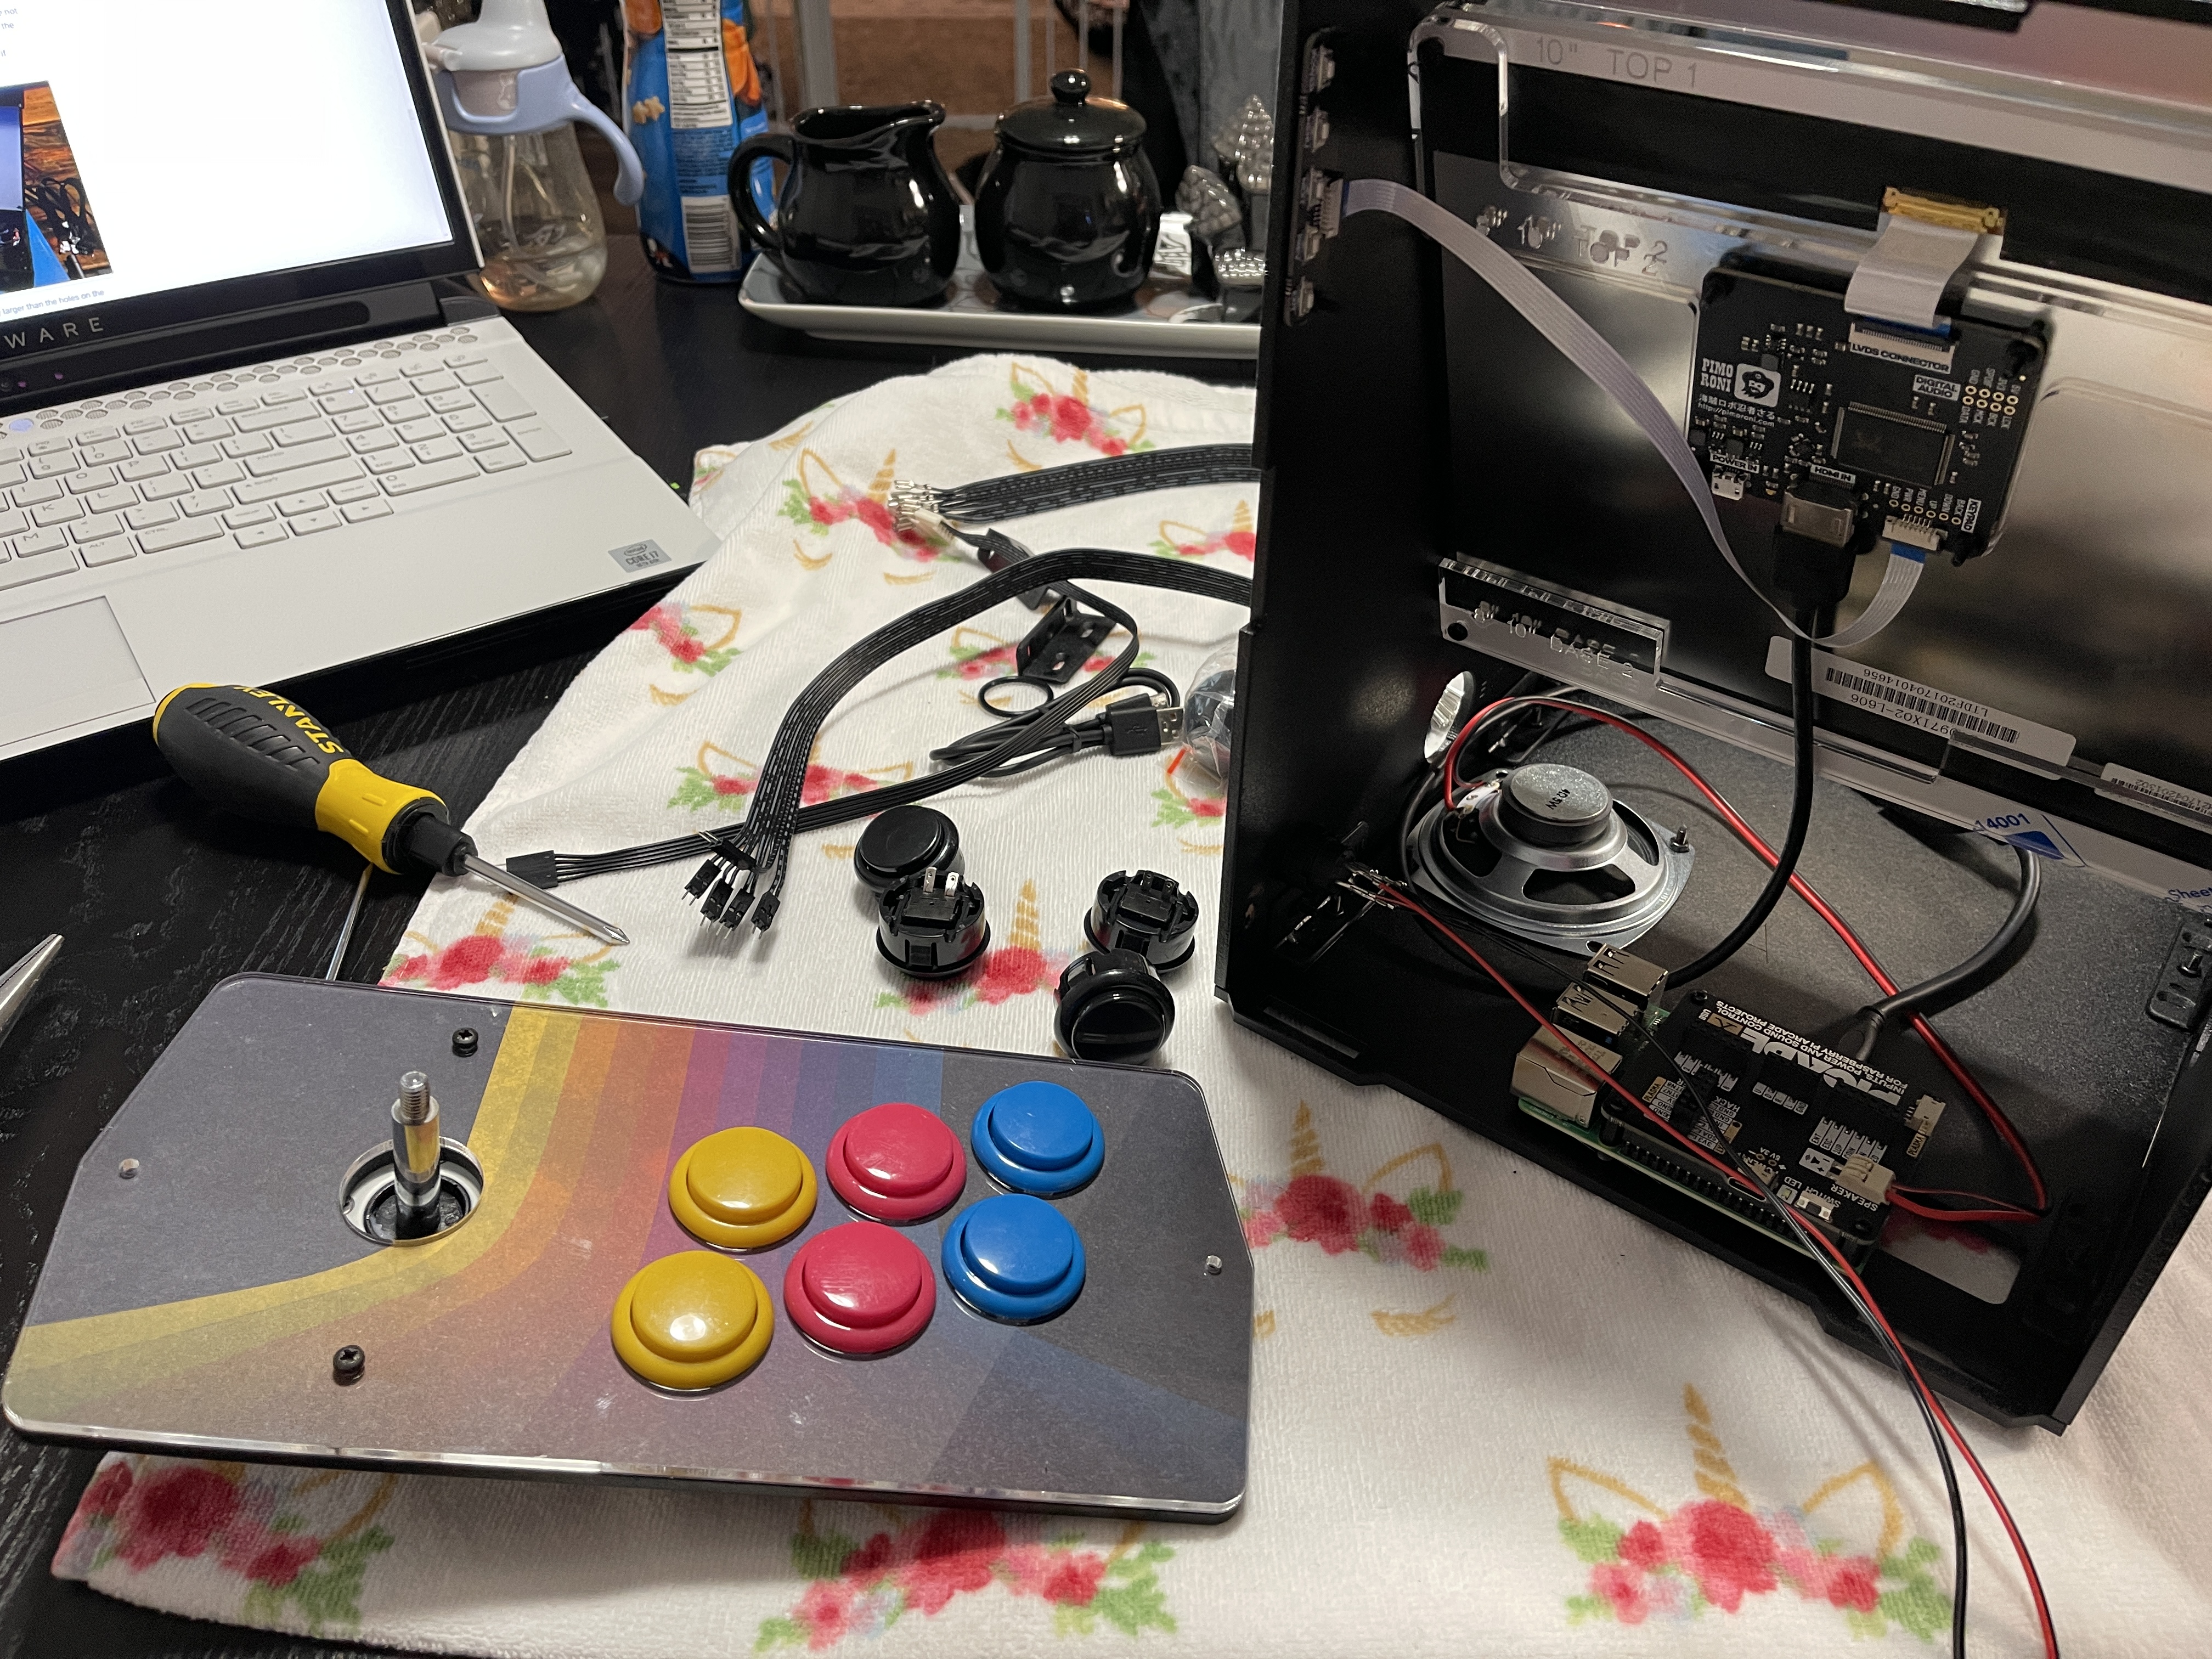
I have to say that the unboxing experience here was a real treat. The box itself looks nice, is in full-color print, and has tons of information on it. This looks like something you would see on a store shelf. It has enough information on the outside and tells you quite a bit about what you’re going to get into. When you pull the lid off, the documentation is all on top, including an envelope bursting with dozens of stickers, an info sheet on Pico-8, and a redeemable code. This isn’t really my thing, but it’s a program that allows you to share and create 8-bit-style games. You also get a full-size poster! The cabinet itself is sectioned into four boxes and well organized too. The instructions are actually online and are actually well done. I was worried as they were mostly just texting with a few low-res photos and no video. A video does exist on YouTube, but there are no close-ups, and it only gives you a rough idea of where things go. I honestly found the descriptions perfectly fine. They were very detailed and described almost everything very well. I was a little confused at first with the bags of screws, but the instructions even tell you to grab “the big bag of screws” or “use the plastic screws and nuts,” which really helped. Once you unpack each box and separate them, you get an idea of what you have, and it seems overwhelming at first. There are easily three dozen or more parts here. Once I got to building the cabinet, I was able to learn the ins and outs of the cabinet, and I felt if anything went wrong, I knew all the shortcuts for how to get to each part the easiest.
You will need a Philips screwdriver, a power adapter for your Pi, preferably the Canakit one (which I have), or an official Pi adapter. I also recommend a pair of needle-nose pliers and a small flathead screwdriver, as the crimps for the buttons can sometimes need adjusting.


The Build
Building the cabinet was actually quite fun and fairly straightforward. It took me around 2 hours to build the entire thing. I do personally recommend buying real Sanwa buttons, as the ones that come with the Picade are garbage. After about an hour of using them, they start binding up badly and squeaking. The joystick is perfectly fine and feels like a higher-quality Sanwa clone, but these buttons are just unacceptable. Two buttons would stick and stay down after a couple of presses, so playing games was pretty much a no-go until my Sanwa buttons came in. I spent that week messing with the Retropie software and tweaking. Standard 30mm Sanwa buttons fit right in perfectly with no issues, and they feel a million times better. I decided to leave the standard side buttons since you don’t use them very often, but these also started binding up, sticking, and squeaking about two weeks in, so I will have to replace those as well. With the Picade already costing $250 and adding $40 for buttons, they are really racking up the price point.
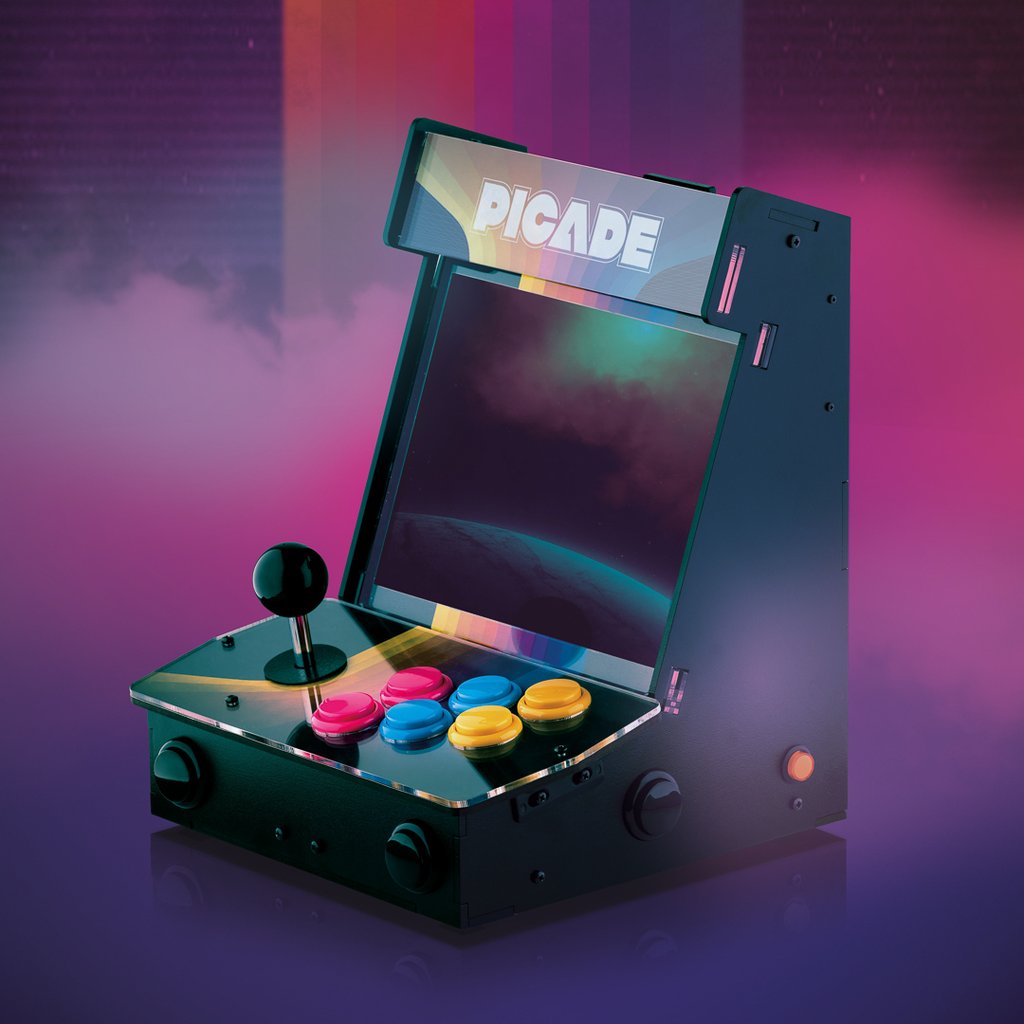
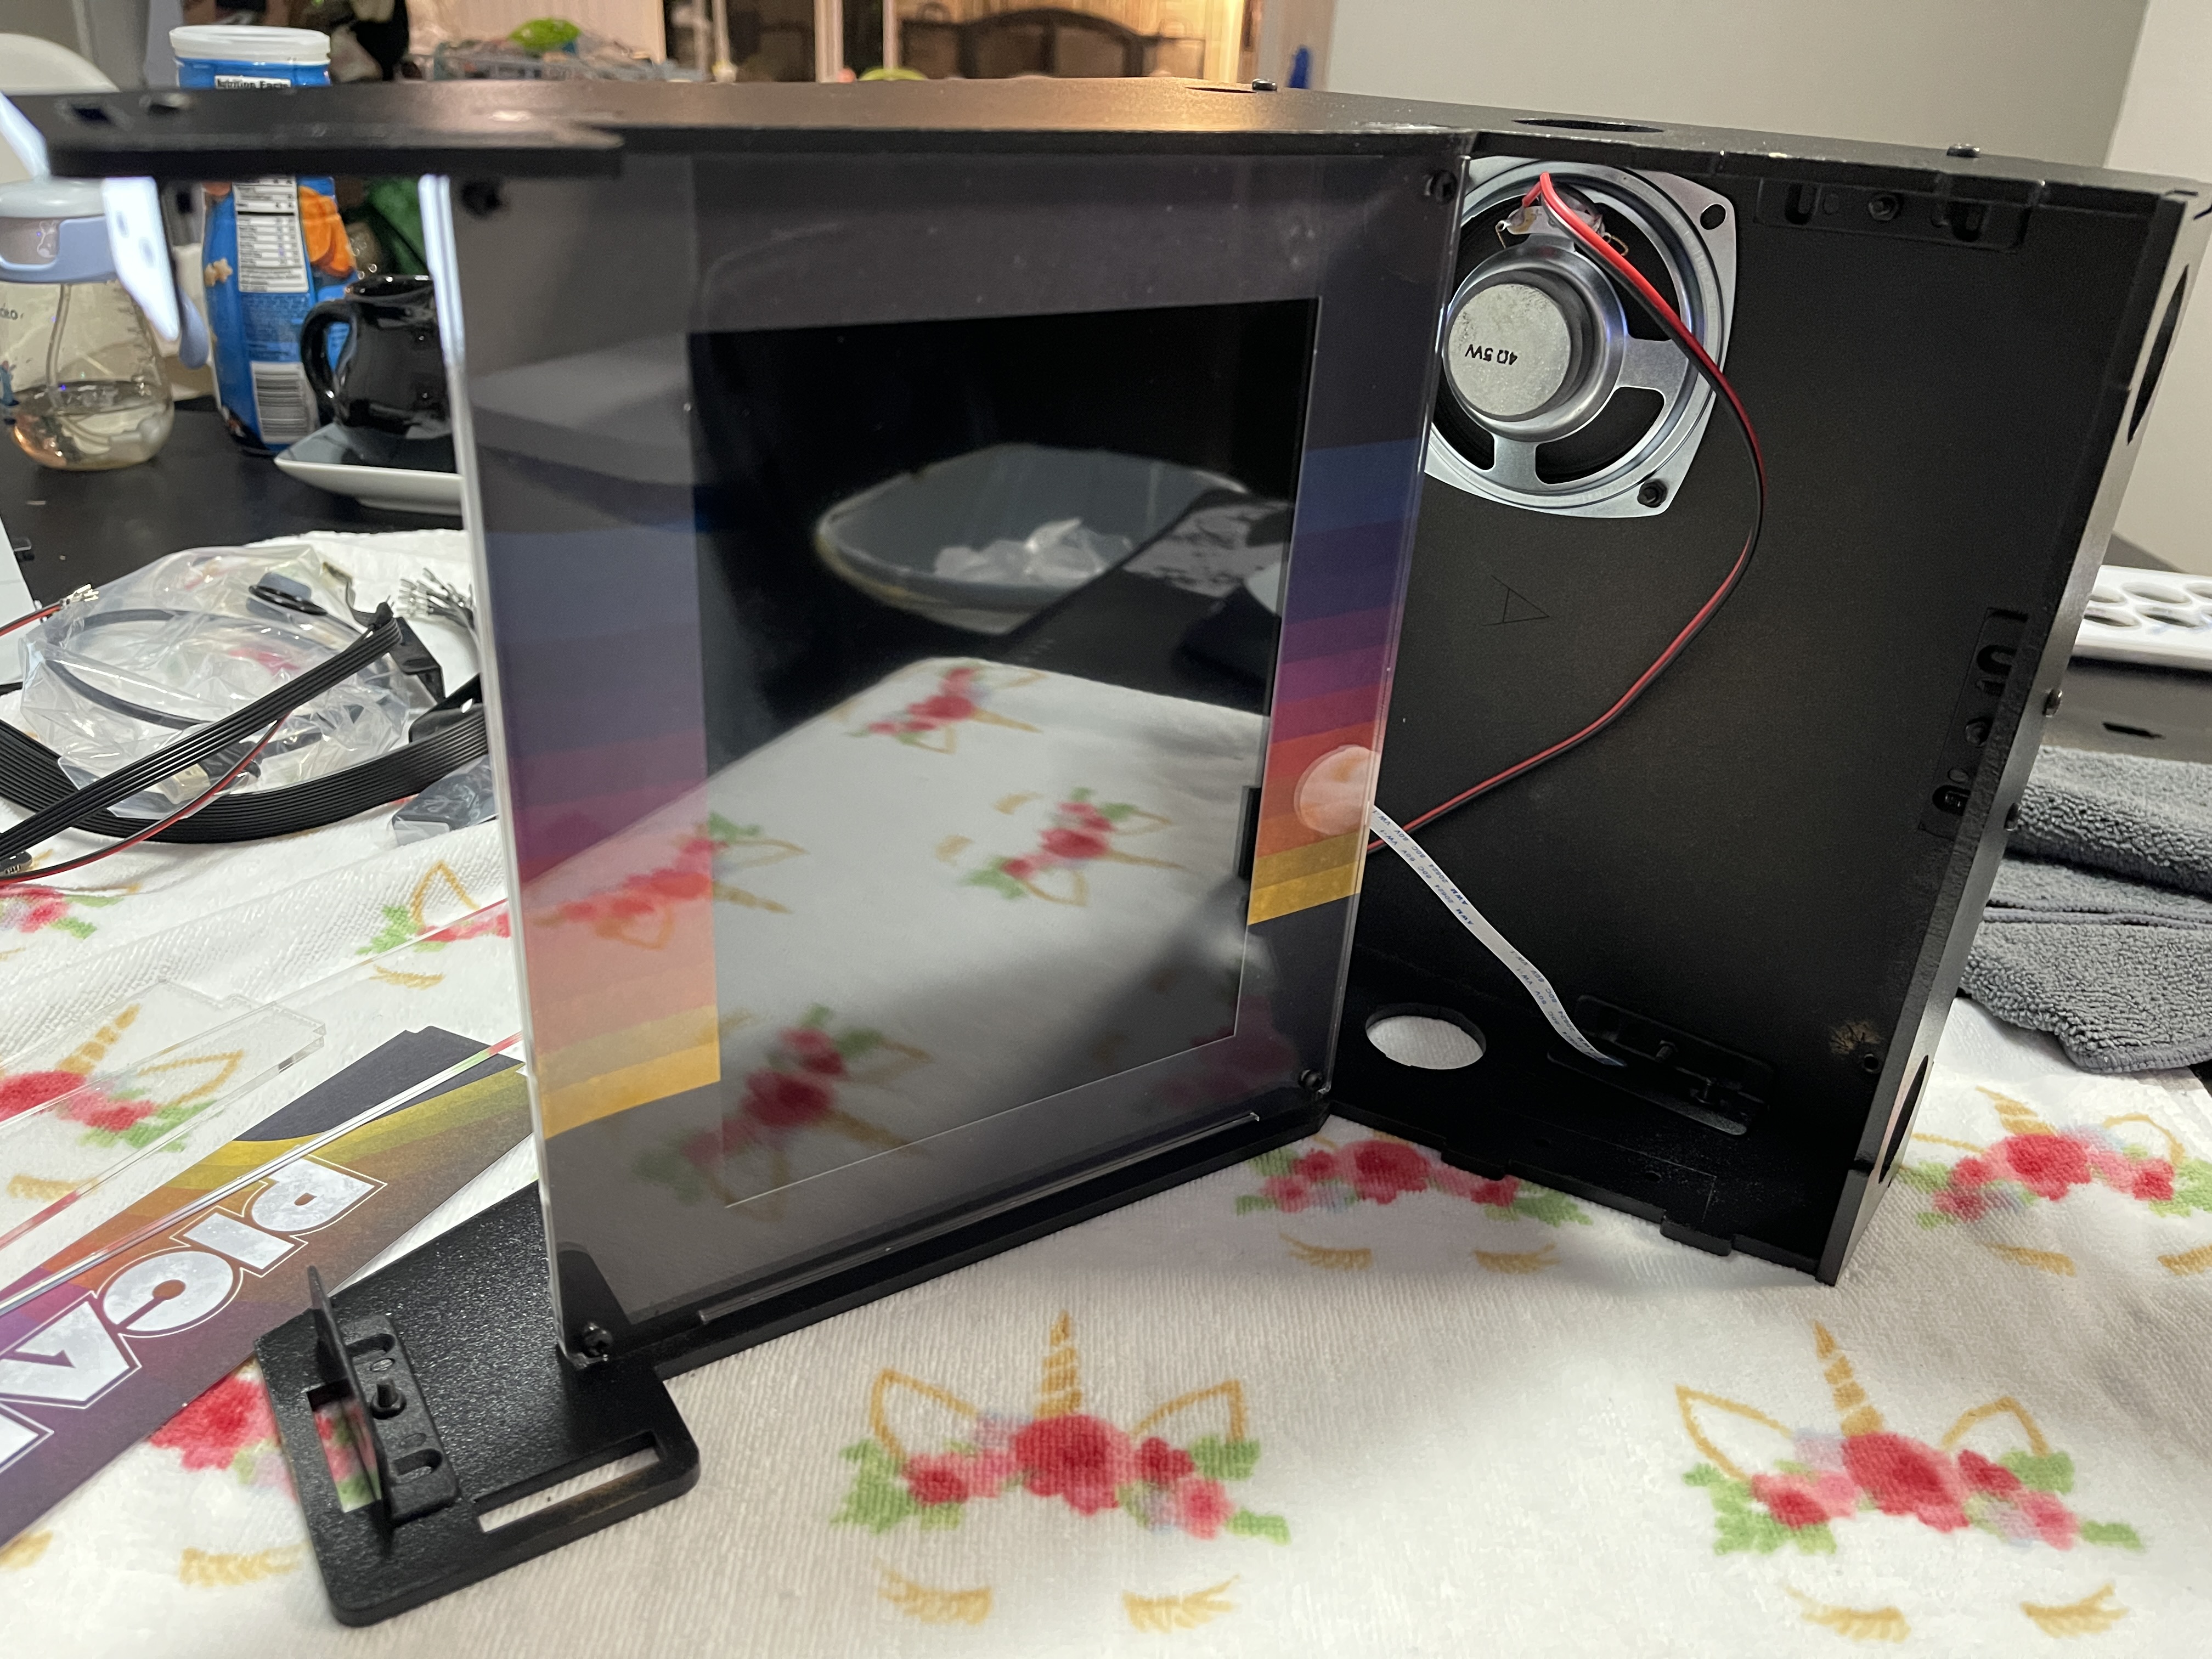
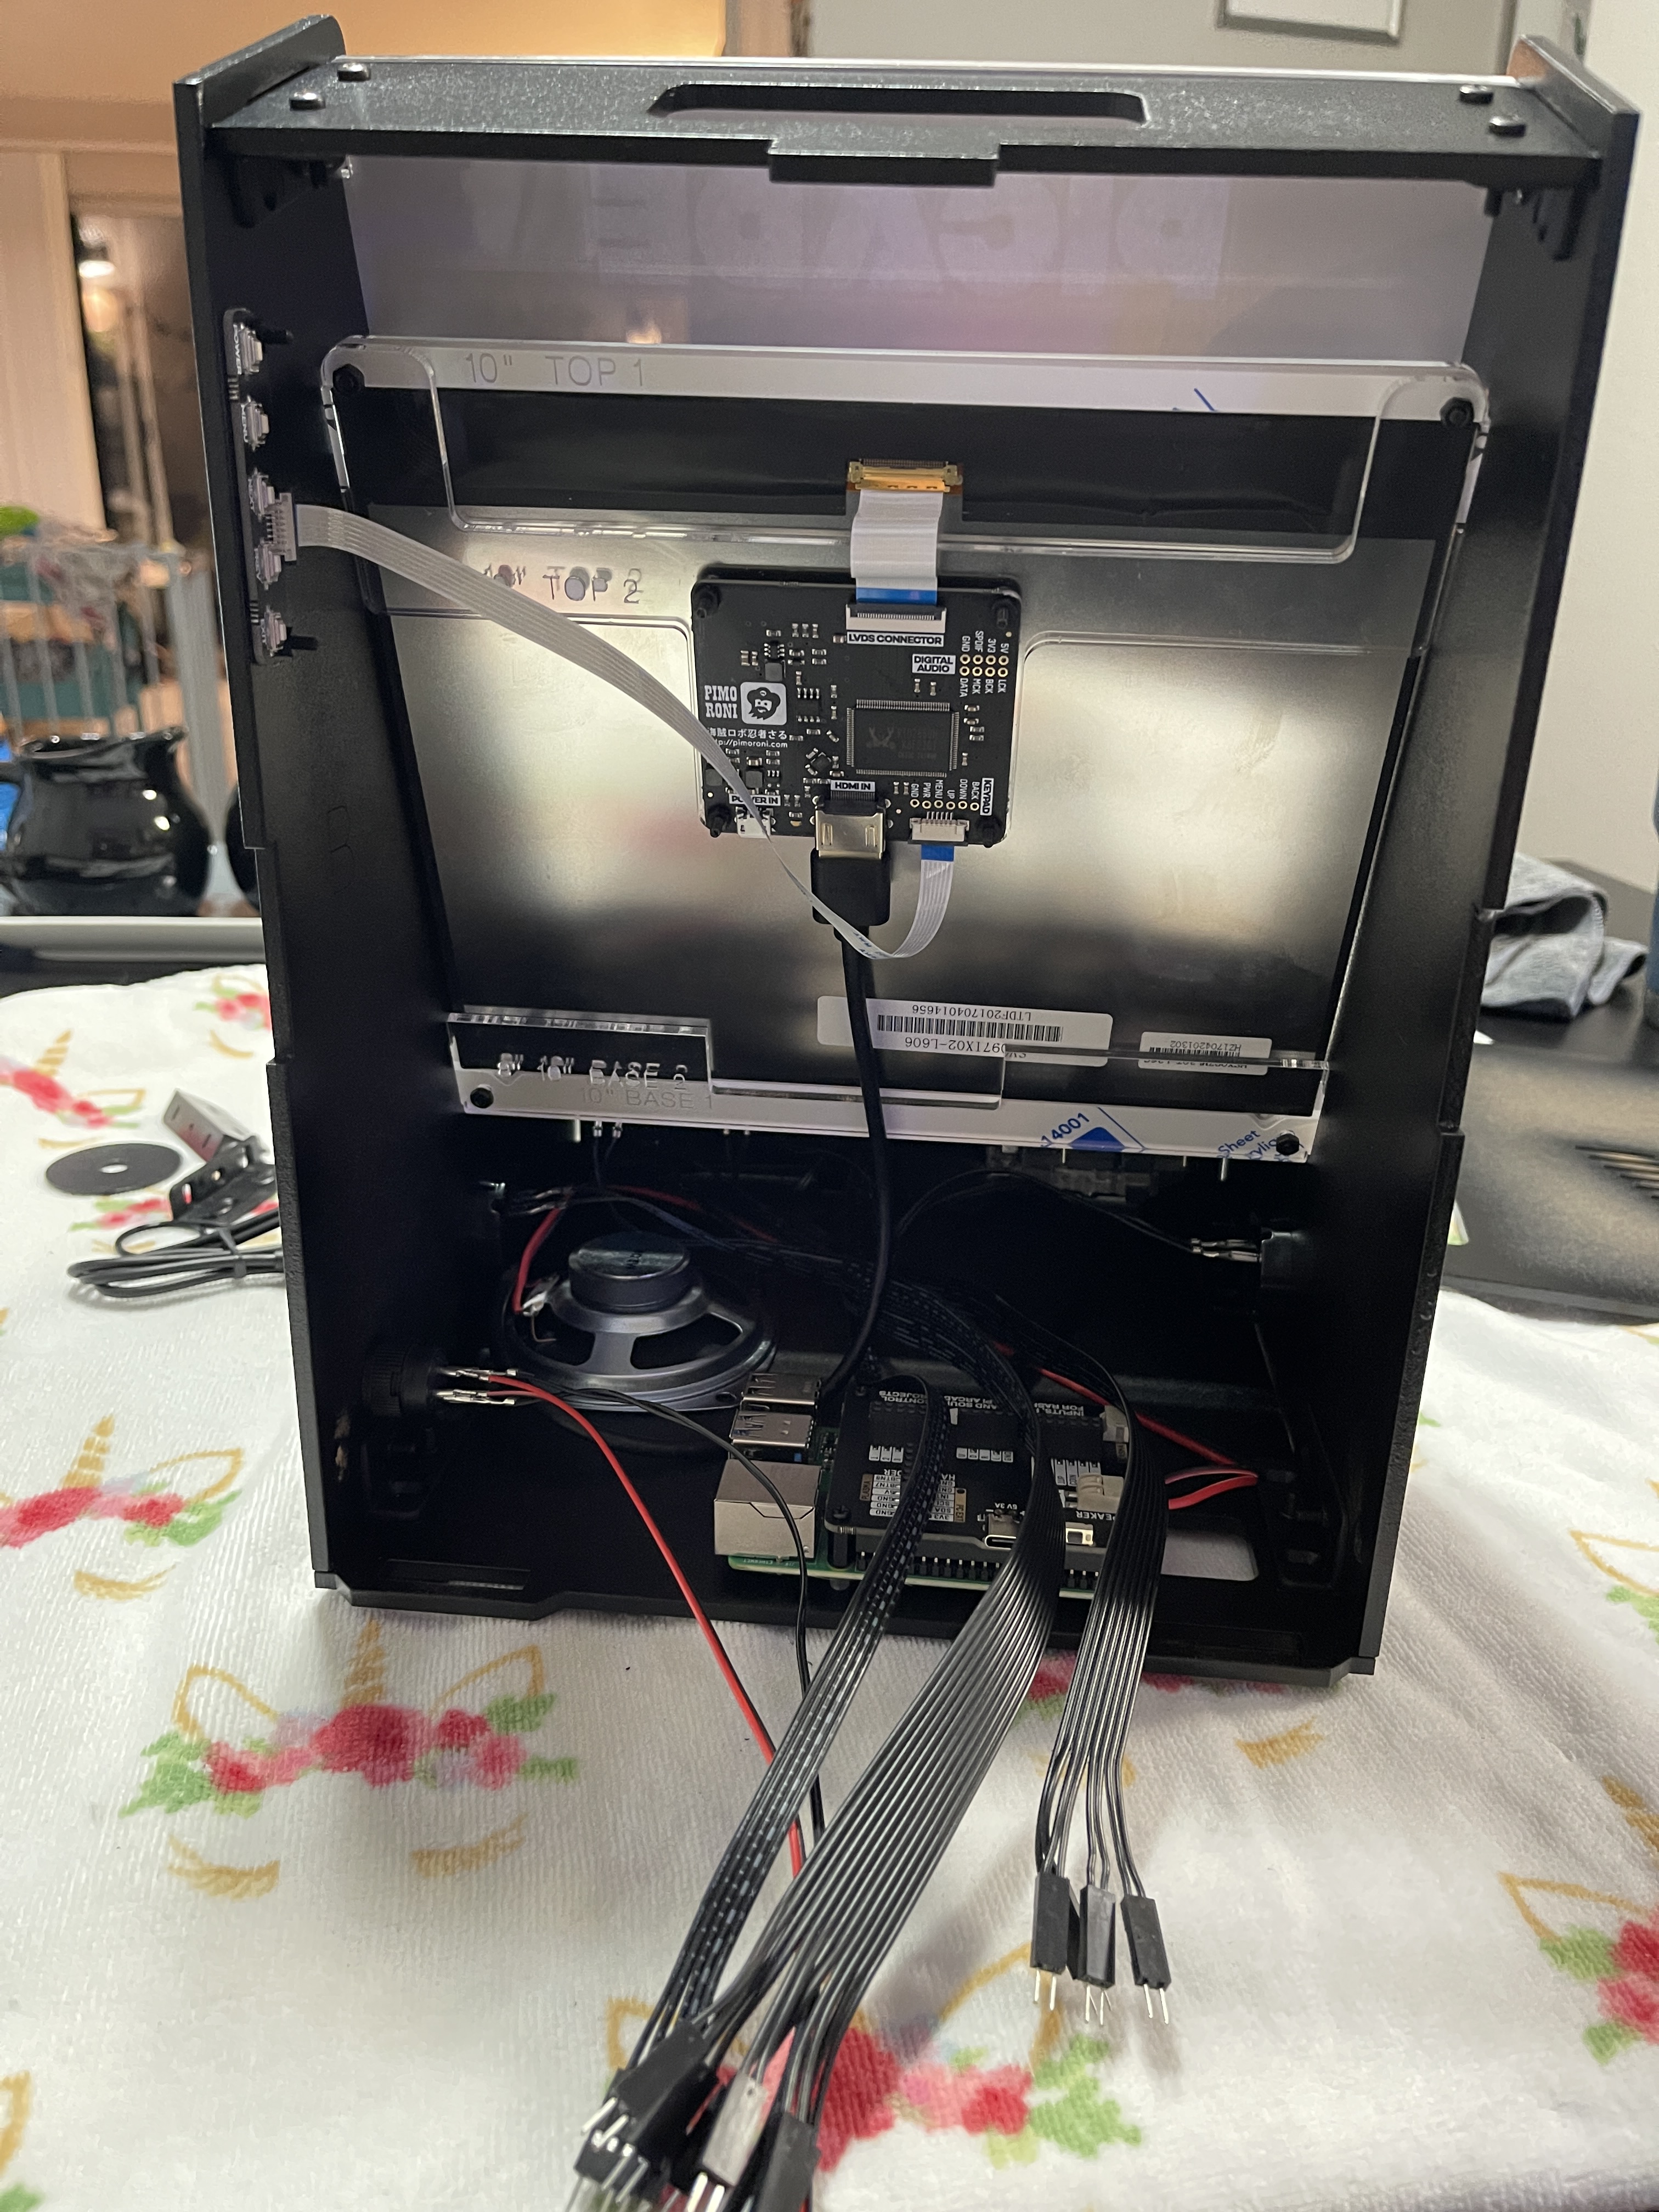
I also found that the standard artwork was fairly boring and will use the template to create my own. Despite those minor issues, the Plexi is sturdy and solid, and the wood panels are powder coated nicely and feel really solid. My only build quality issue is that the marquee is a little loose and could use some slightly smaller cutouts to hold the Plexi panels in place. The rubber feet hold up nicely and keep the Picade from sliding around, and I love that everything is easily accessible. You can access the buttons by taking off the two mounting screws for the control panel, and the back is held on with a single tab and a rubber band. The screen OSD controls have their own cut-out and mount, and the SD card is accessible via a slot at the bottom. This is not just sturdy and fun to build, but also easily serviceable for further customization without the need to dismantle the entire thing.

The Initial Play Test
First, I highly recommend using a wireless keyboard with the Picade, as you don’t want wires hanging out. I’ve used this keyboard for over a year, and it has a great layout and buttons, and the battery lasts forever. Rii Mini Wireless Keyboard
There really aren’t any instructions on how to use Retropie or customize it. There are some software steps you must take to get the screen and Pi Hat working for the control panel, but I ran into an issue right away. While the fix to get the HDMI settings to stick correctly worked and I was setting up WiFi, the update for the Pi Hat didn’t work, and I had to hunt down a fix for nearly an hour, as without this, the controls just wouldn’t work. The link that you are given to put into the command line is correct, but the firmware for your Pi might be outdated. I had to do the following commands to get the link to register and work:.
apt-get update
apt-get upgrade
Then I typed in the instructions to install the Picade drivers, and it worked. They should really add these instructions to the official documentation, as some people may never figure this out and get incredibly frustrated.
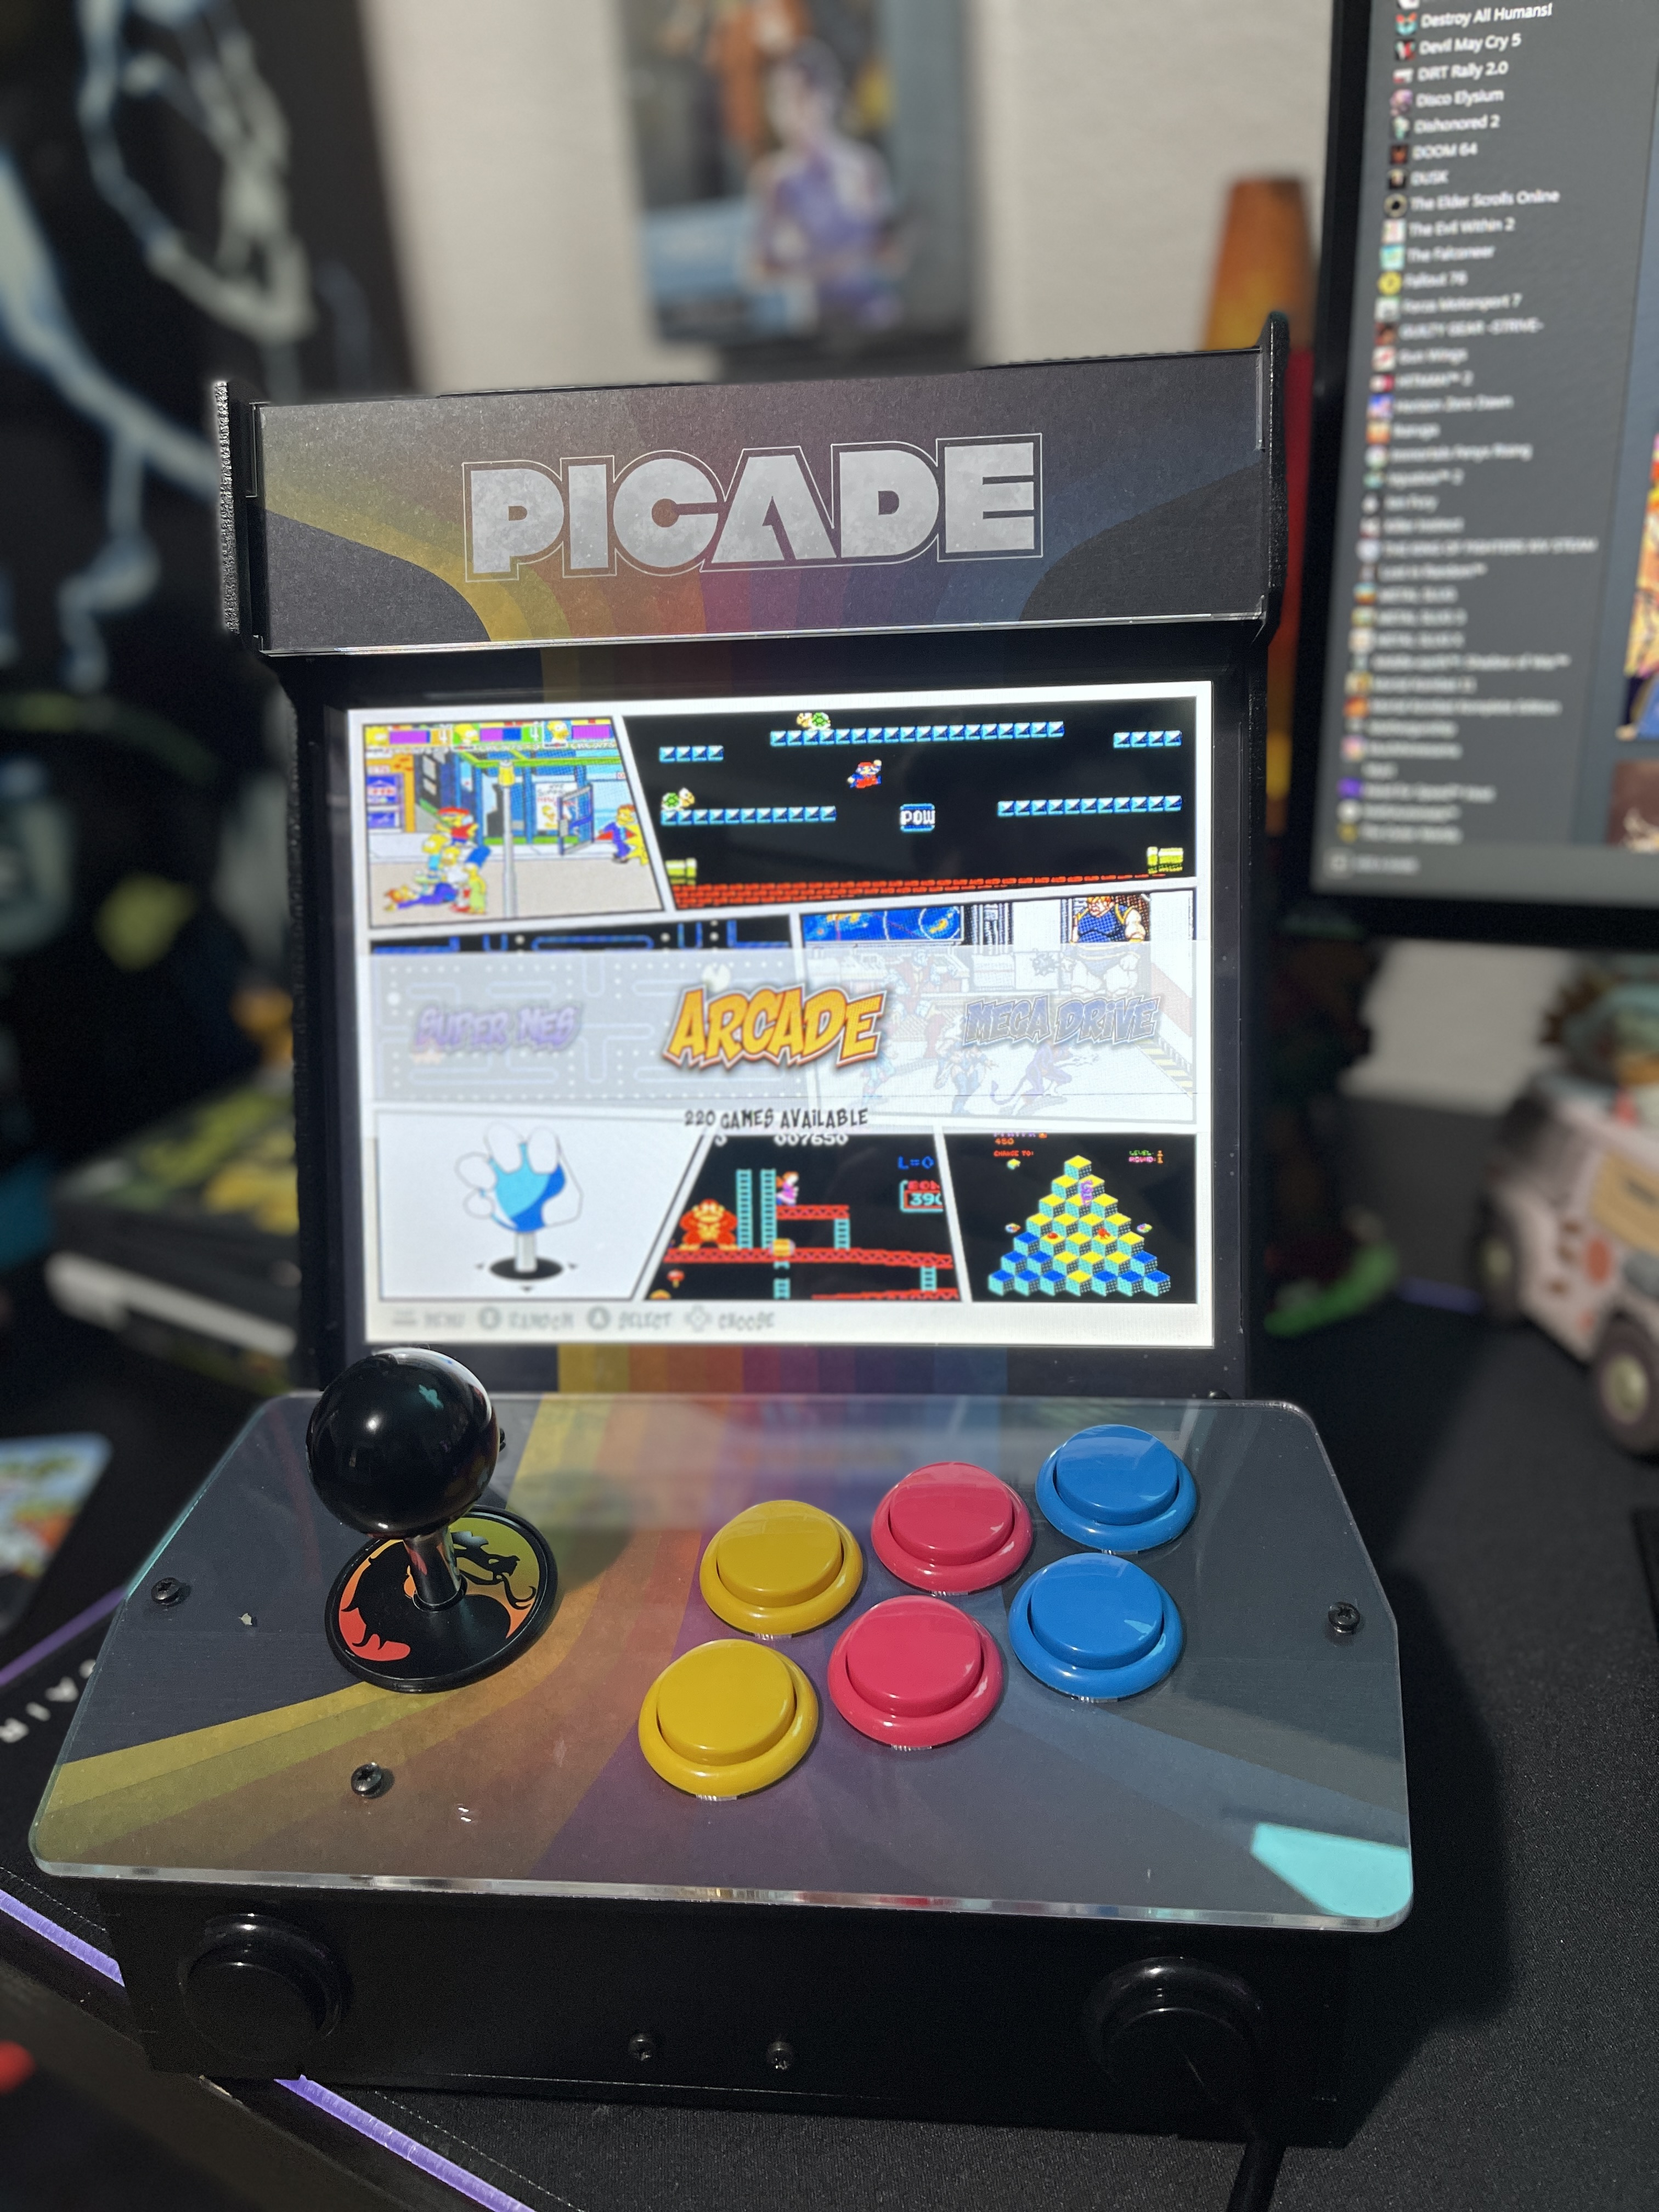
I do want to mention that the LCD screen is gorgeous. It’s a true 4:3 aspect ratio with a 1024×768 resolution, which is perfect for a Pi to render at. I didn’t really need to mess with the OSD settings, as they seemed perfect out of the box. The giant 10″ display with the small bezel just looks so good, and it runs at 60 Hz!
After this, there are instructions on how to get Retropie going by “burning” an image to your SD card. I highly recommend 64GB or higher. Once you pop in your SD card and start up Retropie, there are no further instructions. You just spent $250 and 2-3 hours of your time to set up the controls, and that’s it. There’s no guide on what to do after this, and you must spend hours researching, fiddling, and figuring out what to do. Arcade games are the main reason people will buy this, and this has been one of the most complicated, delicate, and fiddly things I have ever done project-wise. I will post a full guide on setting up Retropie with pretty much every issue you could possibly run into and how to easily customize it without needing to Google every single thing like I had to do. It took me a total of three weeks to fully customize and set up my Picade the way I wanted.


Try multiplayer. A lot of fun !